Let's build a restaurant website with a modern front end and use a headless content management system (CMS) to keep the menu up to date.
See the source code for the finished result.
For the website we will use Gatsby. Gatsby is a web framework that uses React as its front end and GraphQL for its data layer.
The CMS will be Contentful. It is a headless CMS with a GraphQL API, so it works very well with Gatsby.
Step 1: Bootstrap the Website
Start a new project with the Gatsby CLI.
npx gatsby new restaurant-website
cd restaurant-website
yarn develop
Our content structure will be a list of menus. Each menu can have multiple sections. Each section can have multiple items and one image.
Pop open your favorite code editor and create the mock data in a JSON file.
// mock-data.json
[
  {
    "name": "Dinner",
    "sections": [
      {
        "name": "Small Plates",
        "imageAlt": "ricotta & spinach gnocchi",
        "image": "https://images.unsplash.com/photo-1479832912902-77089f02b1d2?ixlib=rb-1.2.1&ixid=eyJhcHBfaWQiOjEyMDd9&auto=format&fit=crop&w=1650&q=80",
        "items": [
          {
            "name": "shrimp pil pil",
            "description": "sizzling shrimp, butter, garlic, chile flake",
            "price": 13
          },
          {
            "name": "ricotta & spinach gnocchi",
            "description": "brown butter, parmesan",
            "price": 8
          }
        ]
      },
      {
        "name": "Mains",
        "imageAlt": "Baja Taco",
        "image": "https://images.unsplash.com/photo-1568106690101-fd6822e876f6?ixlib=rb-1.2.1&ixid=eyJhcHBfaWQiOjEyMDd9&auto=format&fit=crop&w=1780&q=80",
        "items": [
          {
            "name": "baja taco",
            "description": "hand battered/fried cod, provolone, chile aioli, tomatillo, shredded cabbage, queso cotija",
            "price": 7
          },
          {
            "name": "bucatini & meatballs",
            "description": "w/ tomato butter",
            "price": 11
          }
        ]
      }
    ]
  }
]
Now let's put that content into React components. All the components will sit on the same index.js file for brevity. In real life, you'd probably split each out into a separate file.
We'll have three components other than the main page component in this file: Menu, MenuSection, MenuItem. We'll use some basic styling so it's somewhat presentable.
// src/pages/index.js
import React from "react"
import Layout from "../components/layout"

import menus from "../../mock-data.json"

const MenuItem = ({ name, description, price }) => (
  <div
    style={{ display: "flex", justifyContent: "space-bewteen", width: "100%" }}
  >
    <div style={{ flexGrow: 1 }}>
      <h4 style={{ marginBottom: 0 }}>{name}</h4>
      <p>{description}</p>
    </div>
    <p>{price}</p>
  </div>
)

const MenuSection = ({ name, items, image, imageAlt }) => (
  <div style={{ marginBottom: "4rem" }}>
    <h3>{name}</h3>
    <img src={image} alt={imageAlt} />
    {items.map(item => (
      <MenuItem
      key={item.name}
      name={item.name}
      price={item.price}
      description={item.description}
      />
    ))}
  </div>
)

const Menu = ({ name, sections }) => (
  <div style={{ marginBottom: "4rem" }}>
    <h2>{name}</h2>
    {sections.map(s => (
      <MenuSection
      key={s.name}
      name={s.name}
      items={s.items}
      image={s.image}
      imageAlt={s.imageAlt}
      />
    ))}
  </div>
)

const IndexPage = () => (
  <Layout>
    <div style={{ maxWidth: "28rem", margin: "0 auto" }}>
      <h1 style={{ marginBottom: "4rem" }}>Menus</h1>
      {menus.map(m => (
        <Menu key={m.key} name={m.name} sections={m.sections} />
      ))}
    </div>
  </Layout>
)

export default IndexPage
And with that, we've layed out our structured content.
The restaurant owner is not going to want to manage content in a JSON file and commit to git. Let's make the move from JSON to Contentful.
Contentful
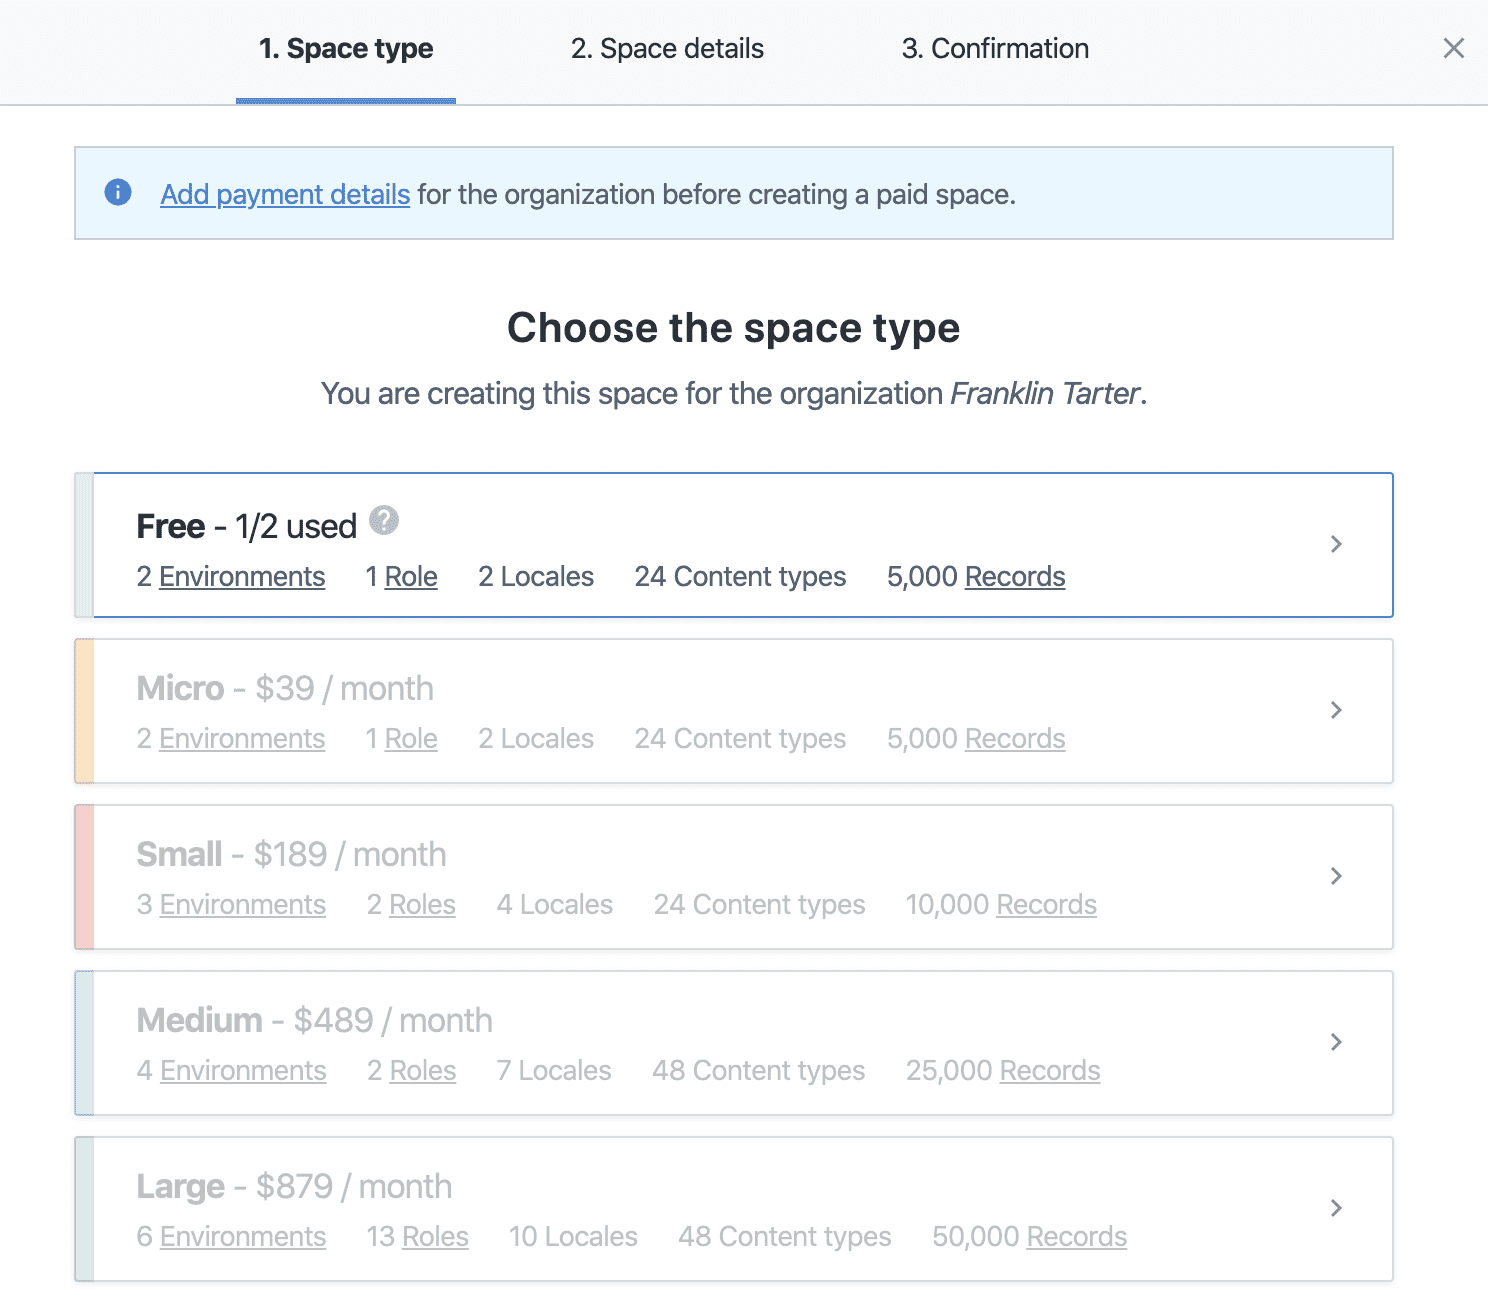
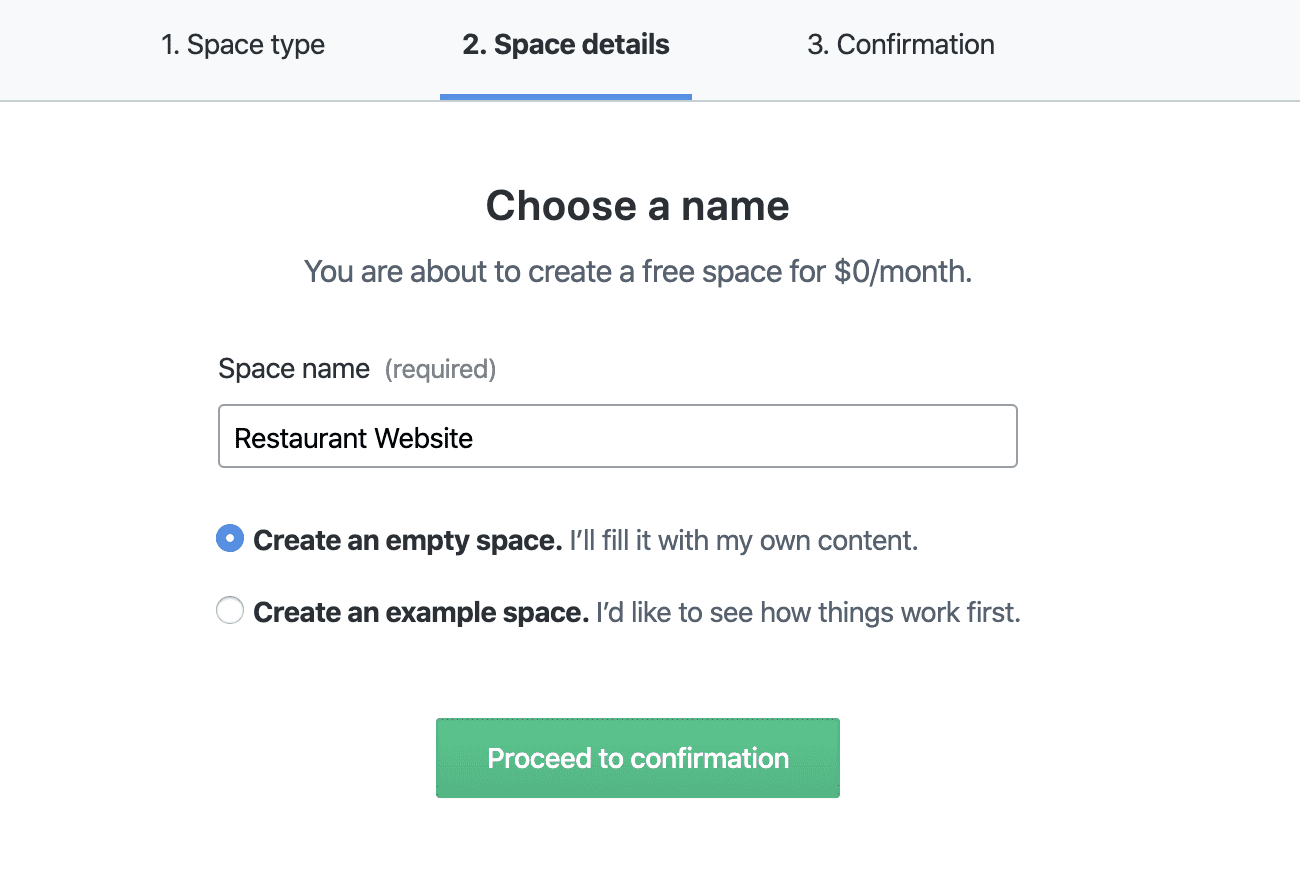
You can create a free Contentful account if you don't have one. Contentful's onboarding screens may change but you will want to get to a blank "Space".
As of this writing you can create a free space on the free tier and keep the "Create an empty space" option.
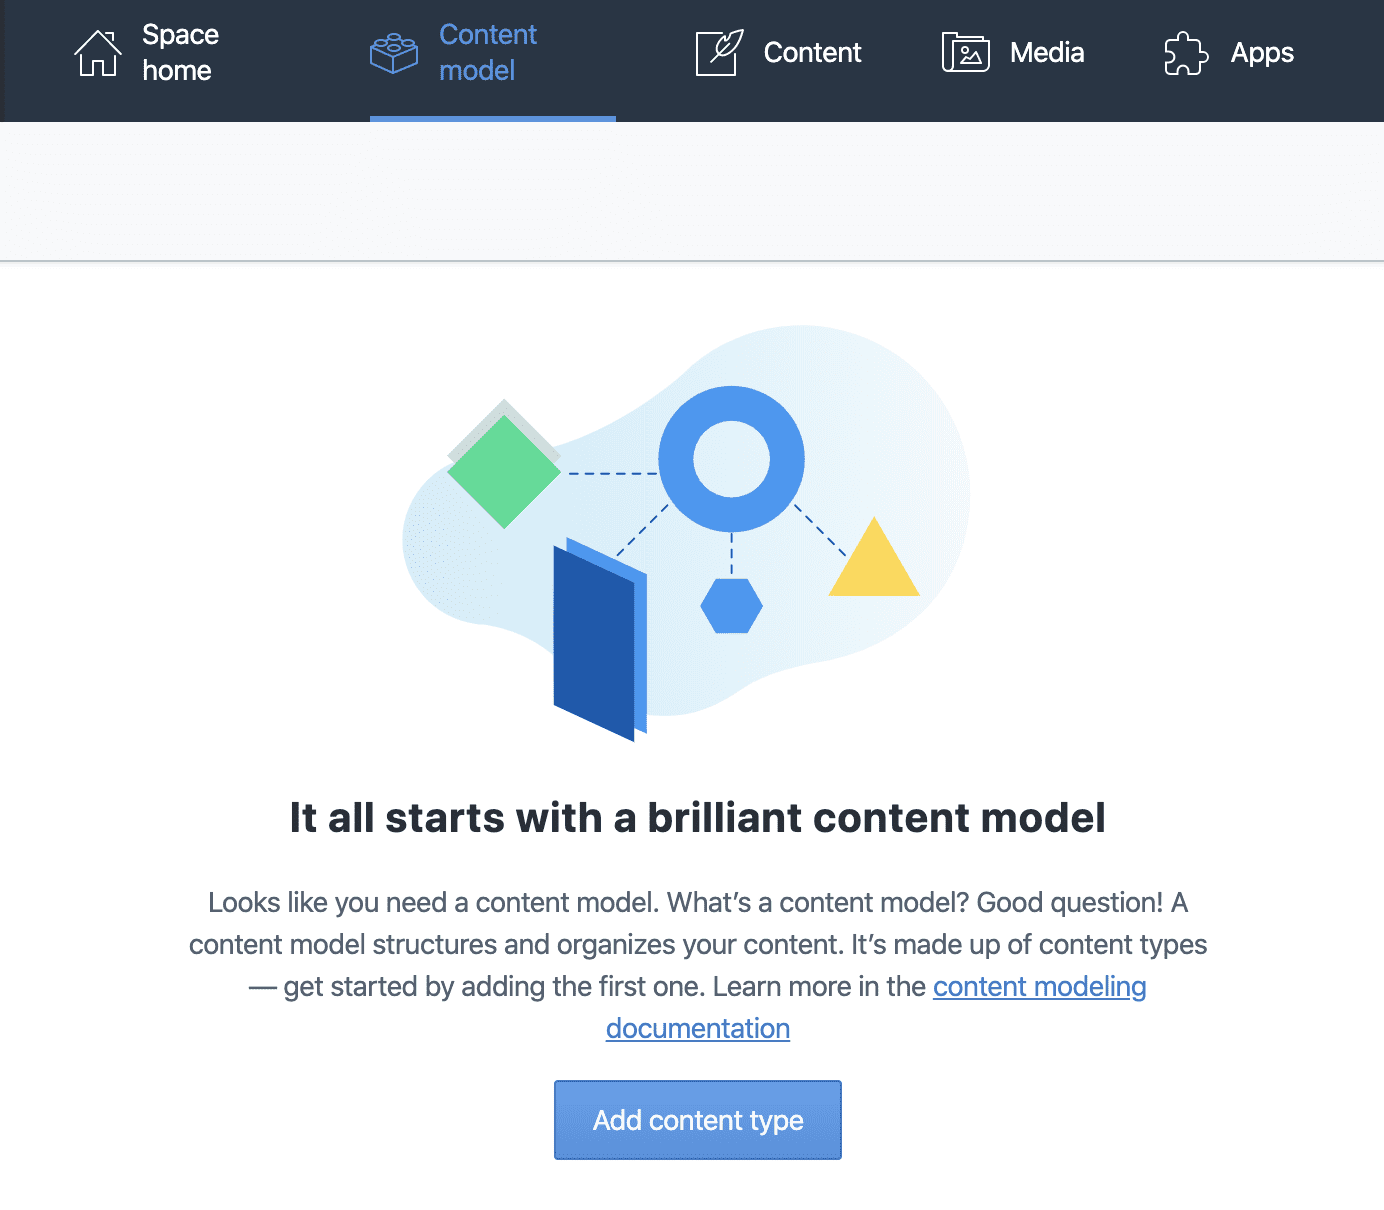
If you've arrived at a blank space through that path or any other path you should see a recommendation to create a new content type.
We'll add a content type for each object type in our mock JSON content. We will need 3 in total with the following structure:
- Menu
- Name
- List of Menu Sections
- Menu Section
- Name
- Image
- Image Alt
- List of Menu Items
- Menu Item
- Name
- Description
- Price
We'll run through creating the Menu in detail with screenshots but then reference the list above to determine what options to use in Contentful.
First Content Type
It's efficient to go bottom-up and create the Menu Item first because the Menu Section has Menu Items as a field, and Menu has Menu Sections as a field. By starting with Menu Items we can create all content models in one pass.
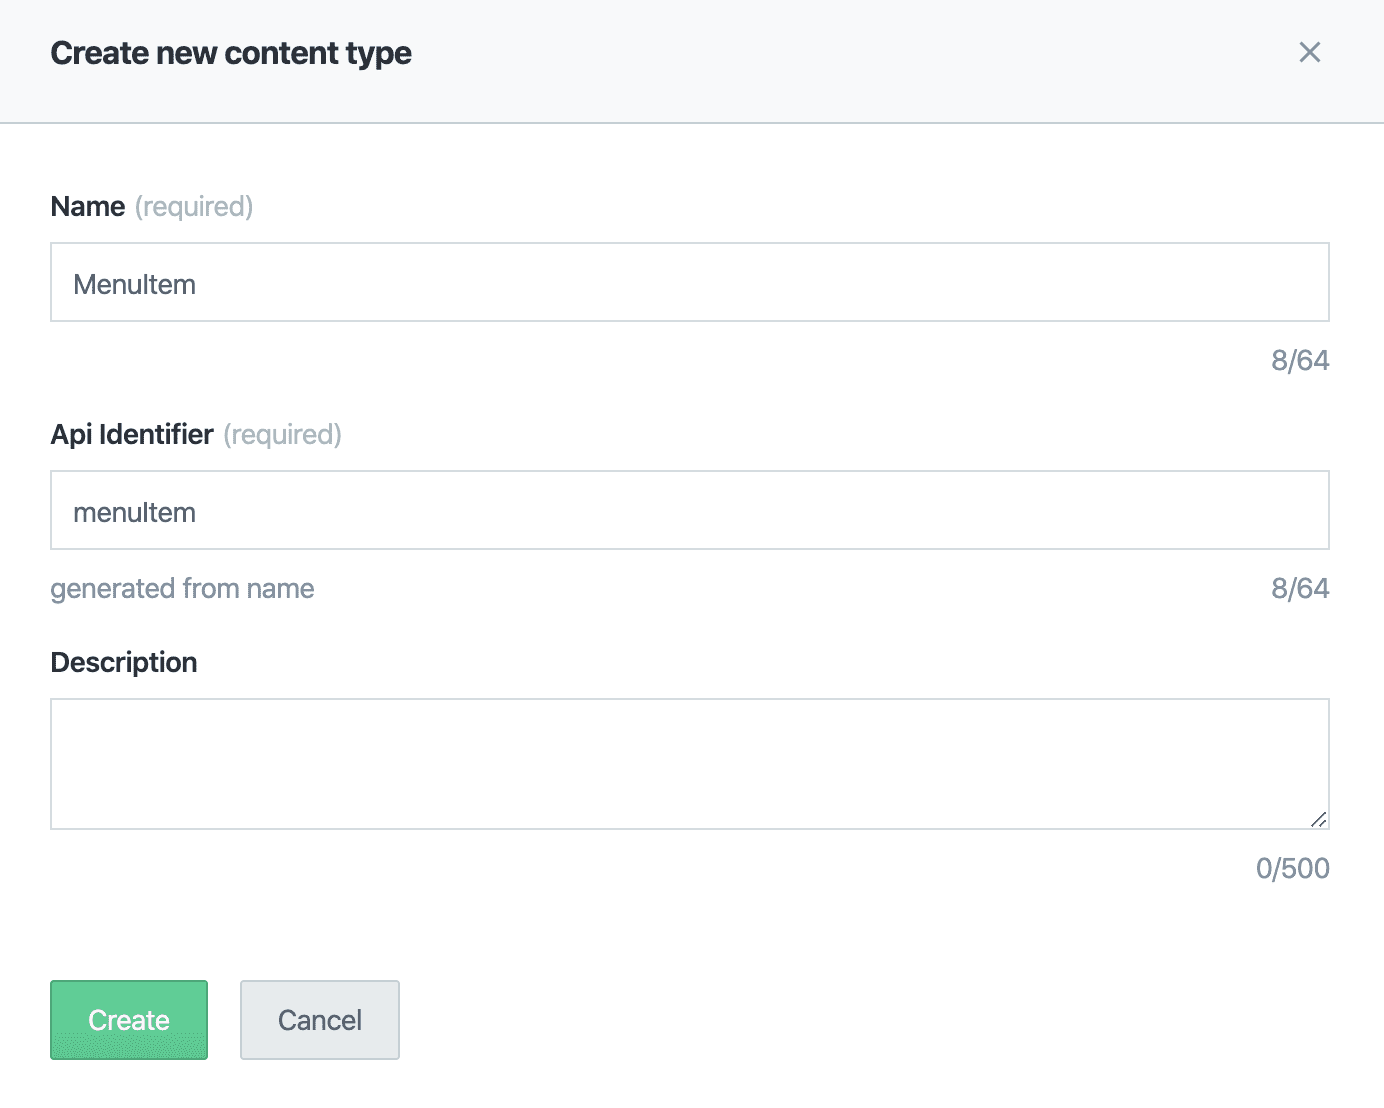
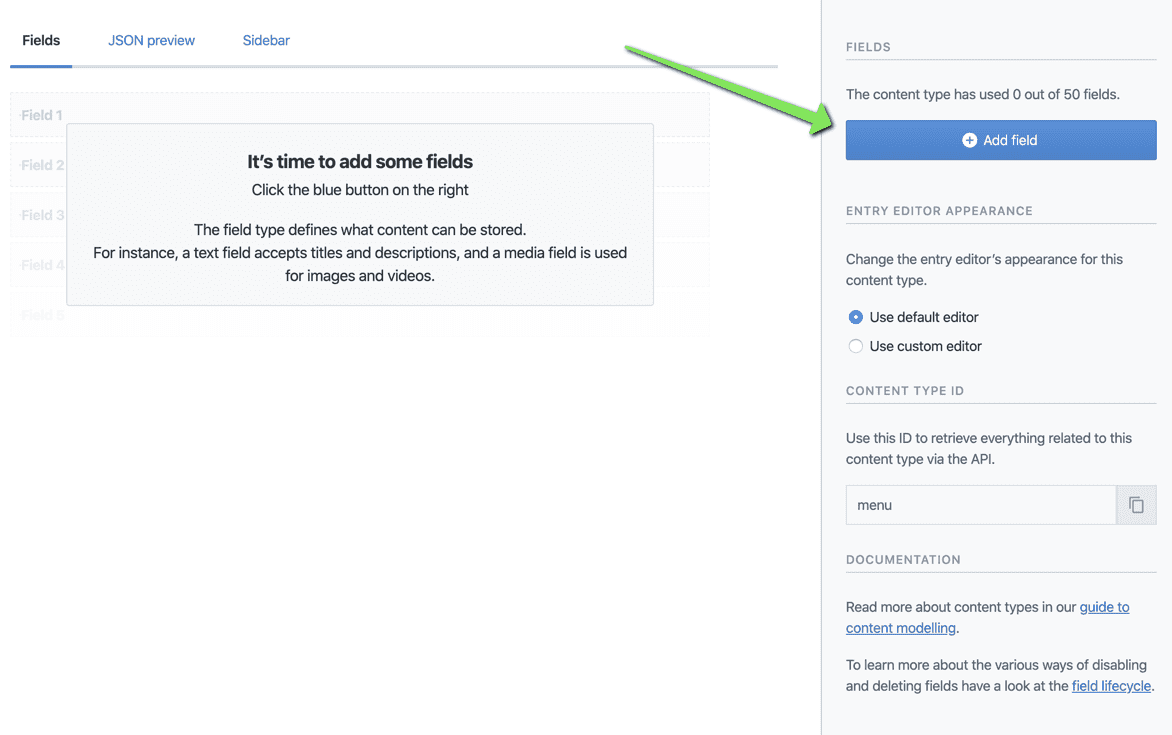
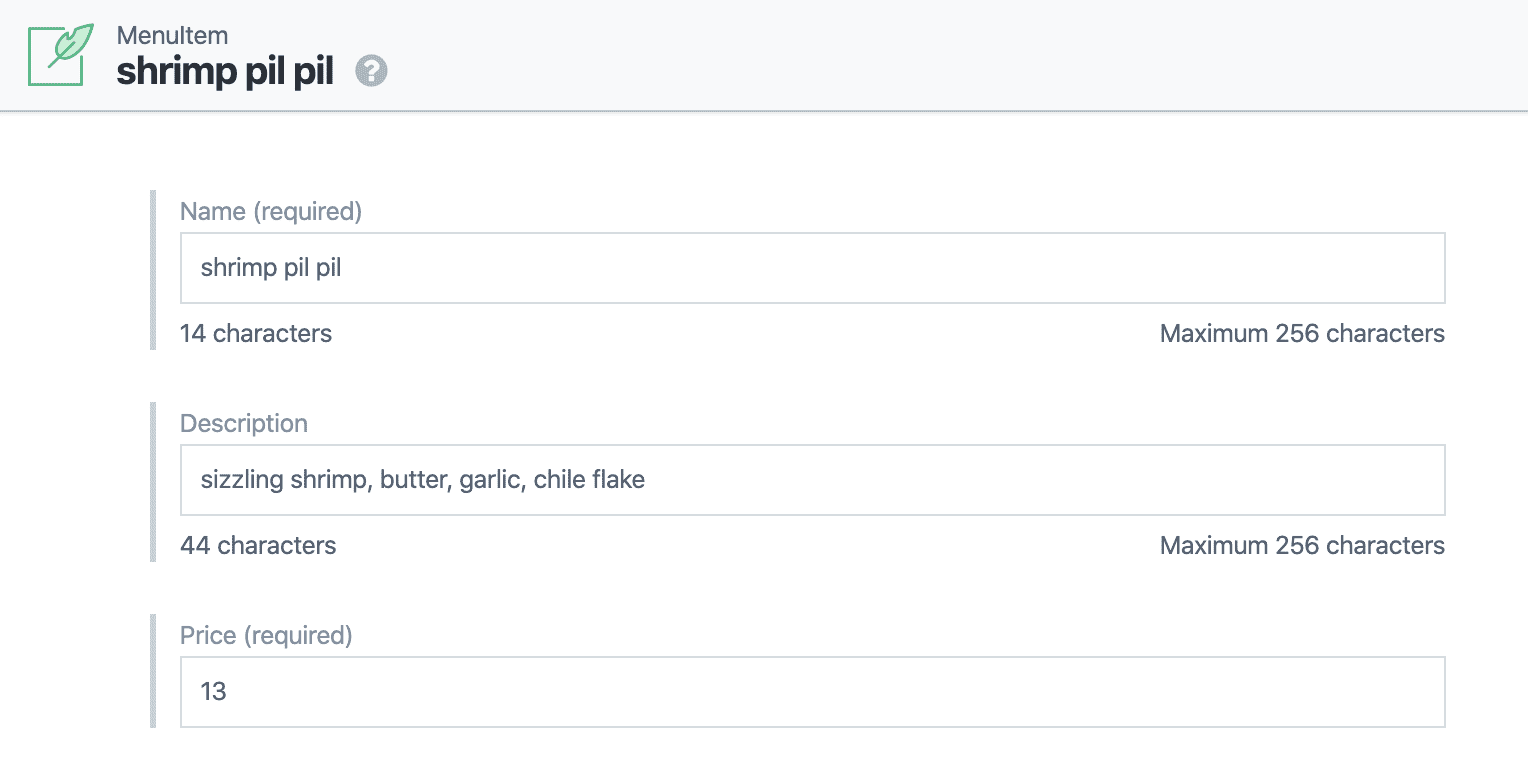
Fill out the info for the Menu Item.
Once we have a content type we can start adding fields. We'll create the "Name" field first.
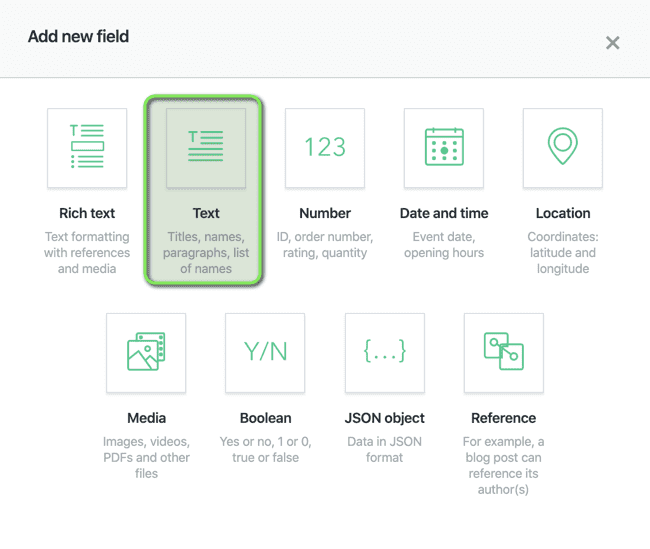
Give it the type "Text".
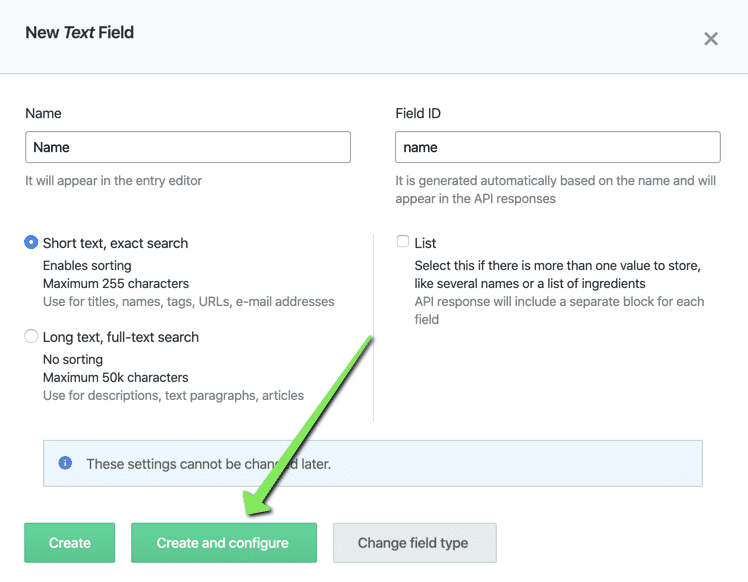
Set the "Name" field to "Name". Then select "Create and configure" there are a few more settings we want to tweak for this field.
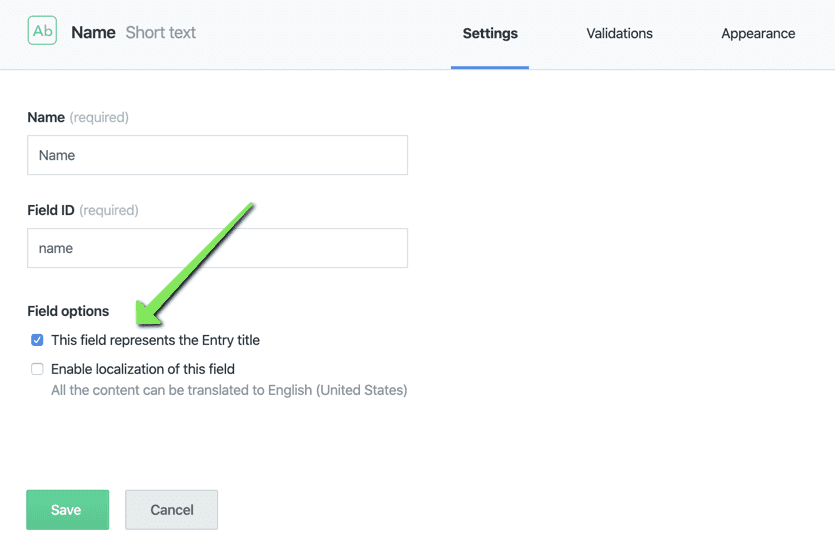
Check the field option for "This field represents the Entry title. This sets the name field as the label in the Contentful editor.
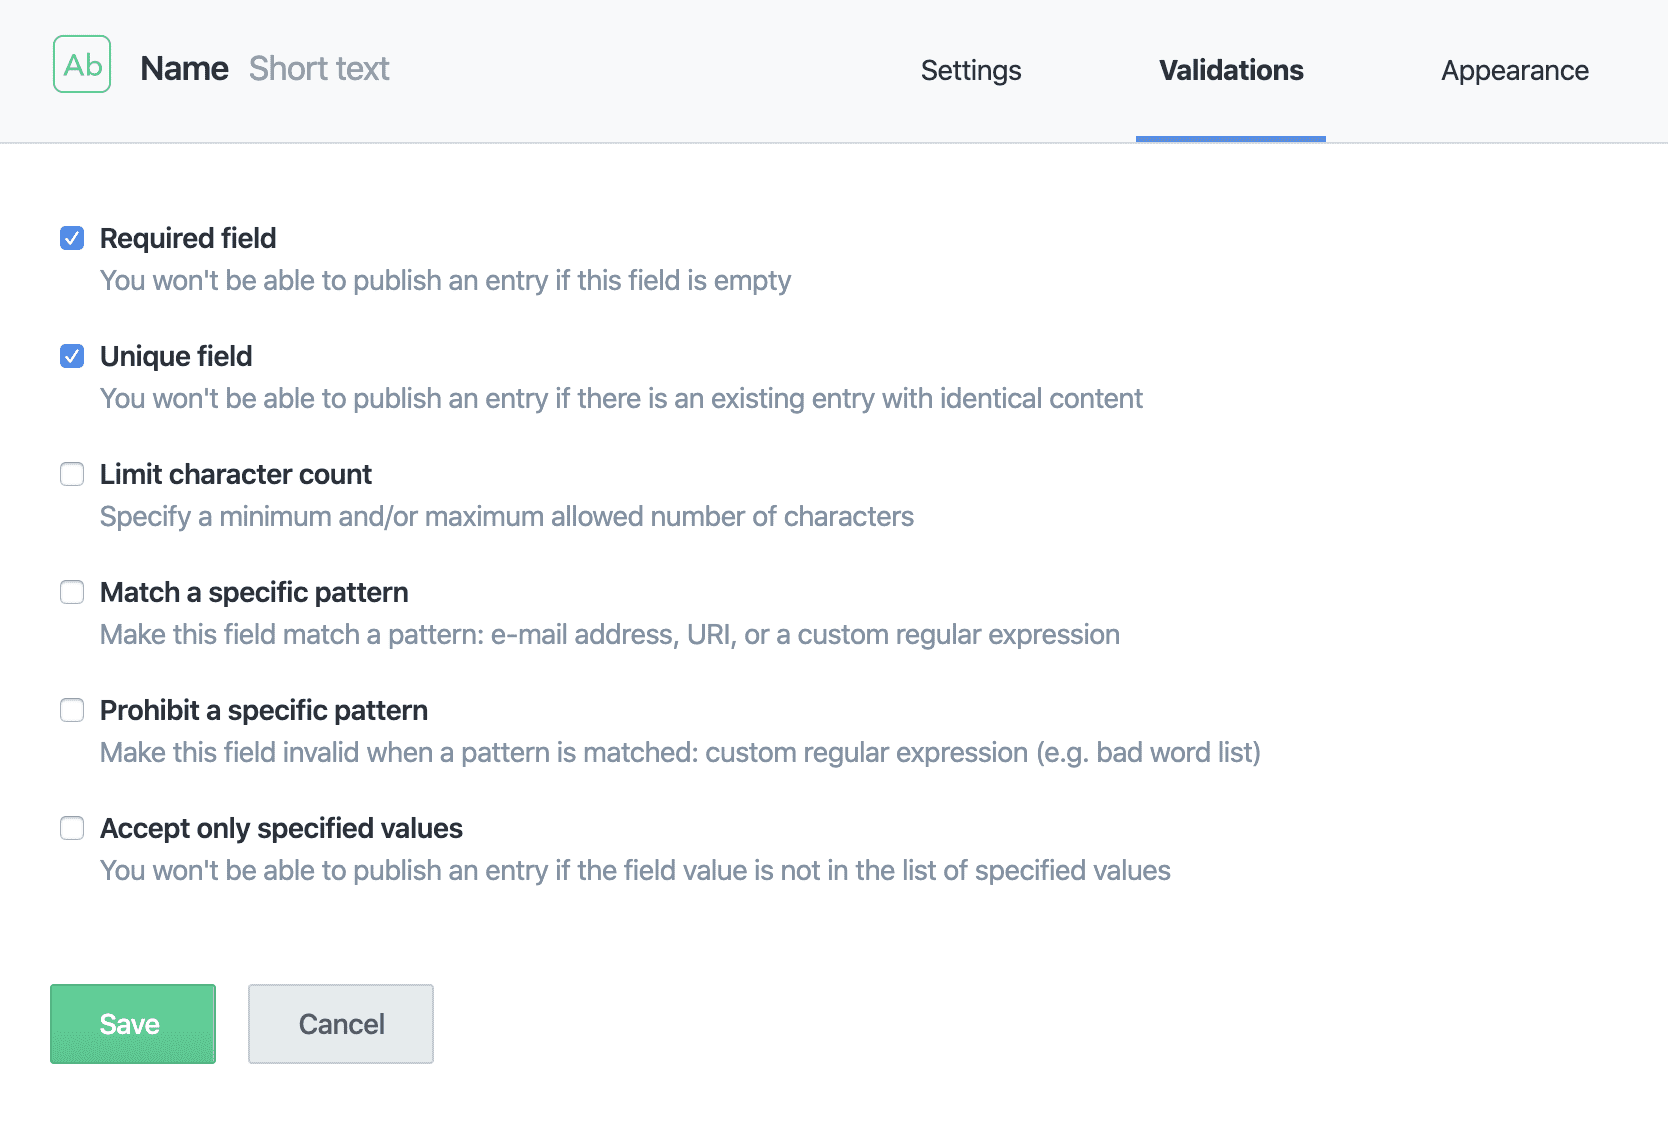
Select the Validations tab in the top right and check off "Required" and "Unique". Because it doesn't make sense to have a menu item with no name, or to have two menu items with the same name. Save with those settings.
I won't run through any more fields in detail since that'd be a ton of screenshots but go ahead and create the other two Menu Item fields as follows:
- Description
- Name: Description
- Type: Text, Short Text
- Price
- Name: Price
- Type: Number, Decimal, Required
One down, two to go
Second Content Type
Now the Menu Section. Create the type as the Menu Item and add the following fields:
- Name
- Name: Name
- Type: Text, Short Text, Required, Unique, Entry title
- Image
- Name: Image
- Type: Media, One File, Required, Accept Only Image File Types
- Image Alt
- Name: Image Alt
- Type: Text, Short Text, Required
- List of Menu Items
- Name: Items
- Type: Reference, Many references, Required, Accept Only MenuItem
Okay, the list of Menu Items is a little different. Let's go into a little more detail.
Adding References
References are how you link your custom content types together. Just how with our JSON object we had Menu Items nested inside of Menu Sections, not just primitive types like numbers and strings. References are how to do that in Contentful.
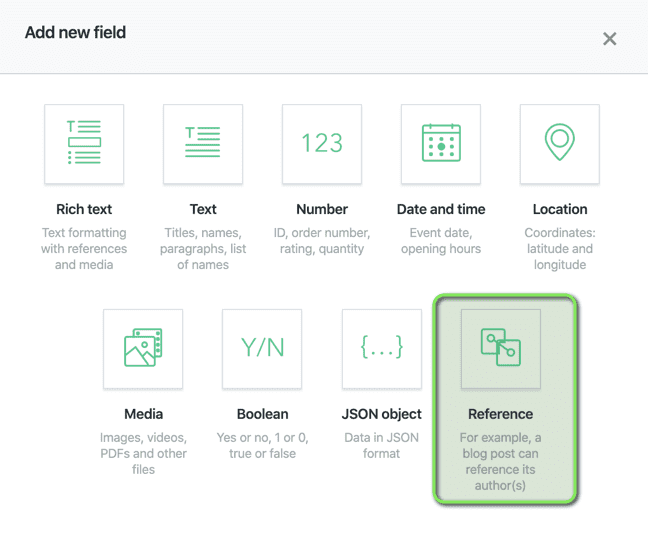
First step is to choose the reference type.
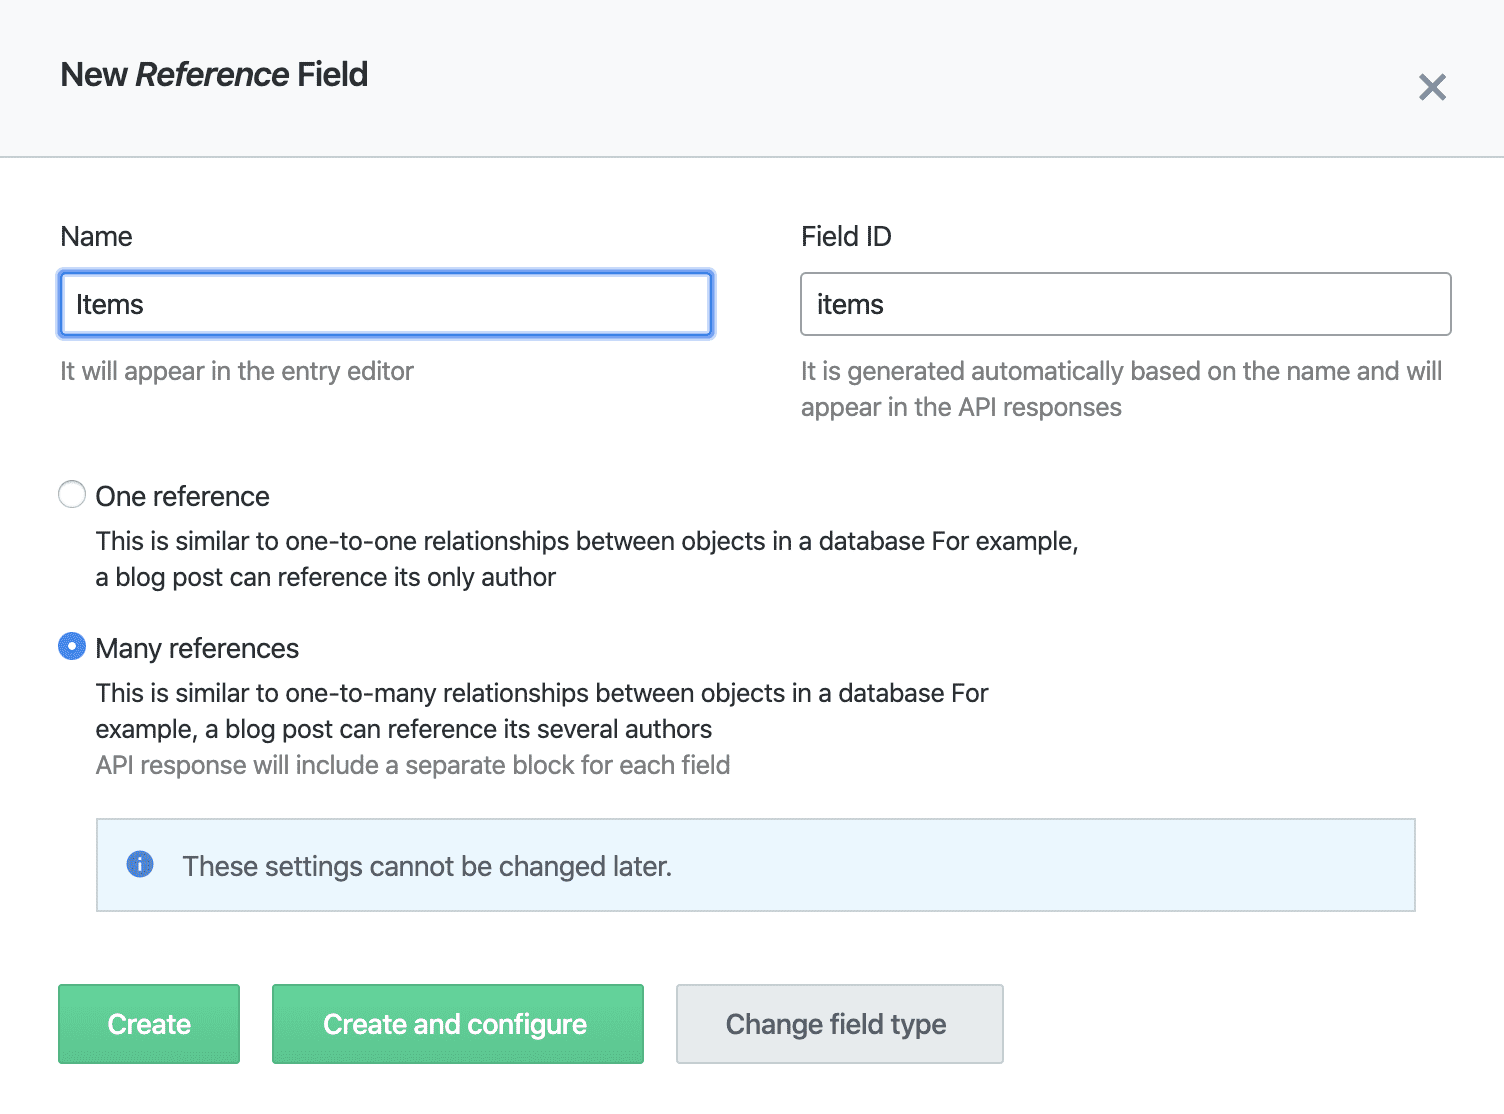
And make sure it takes many references.
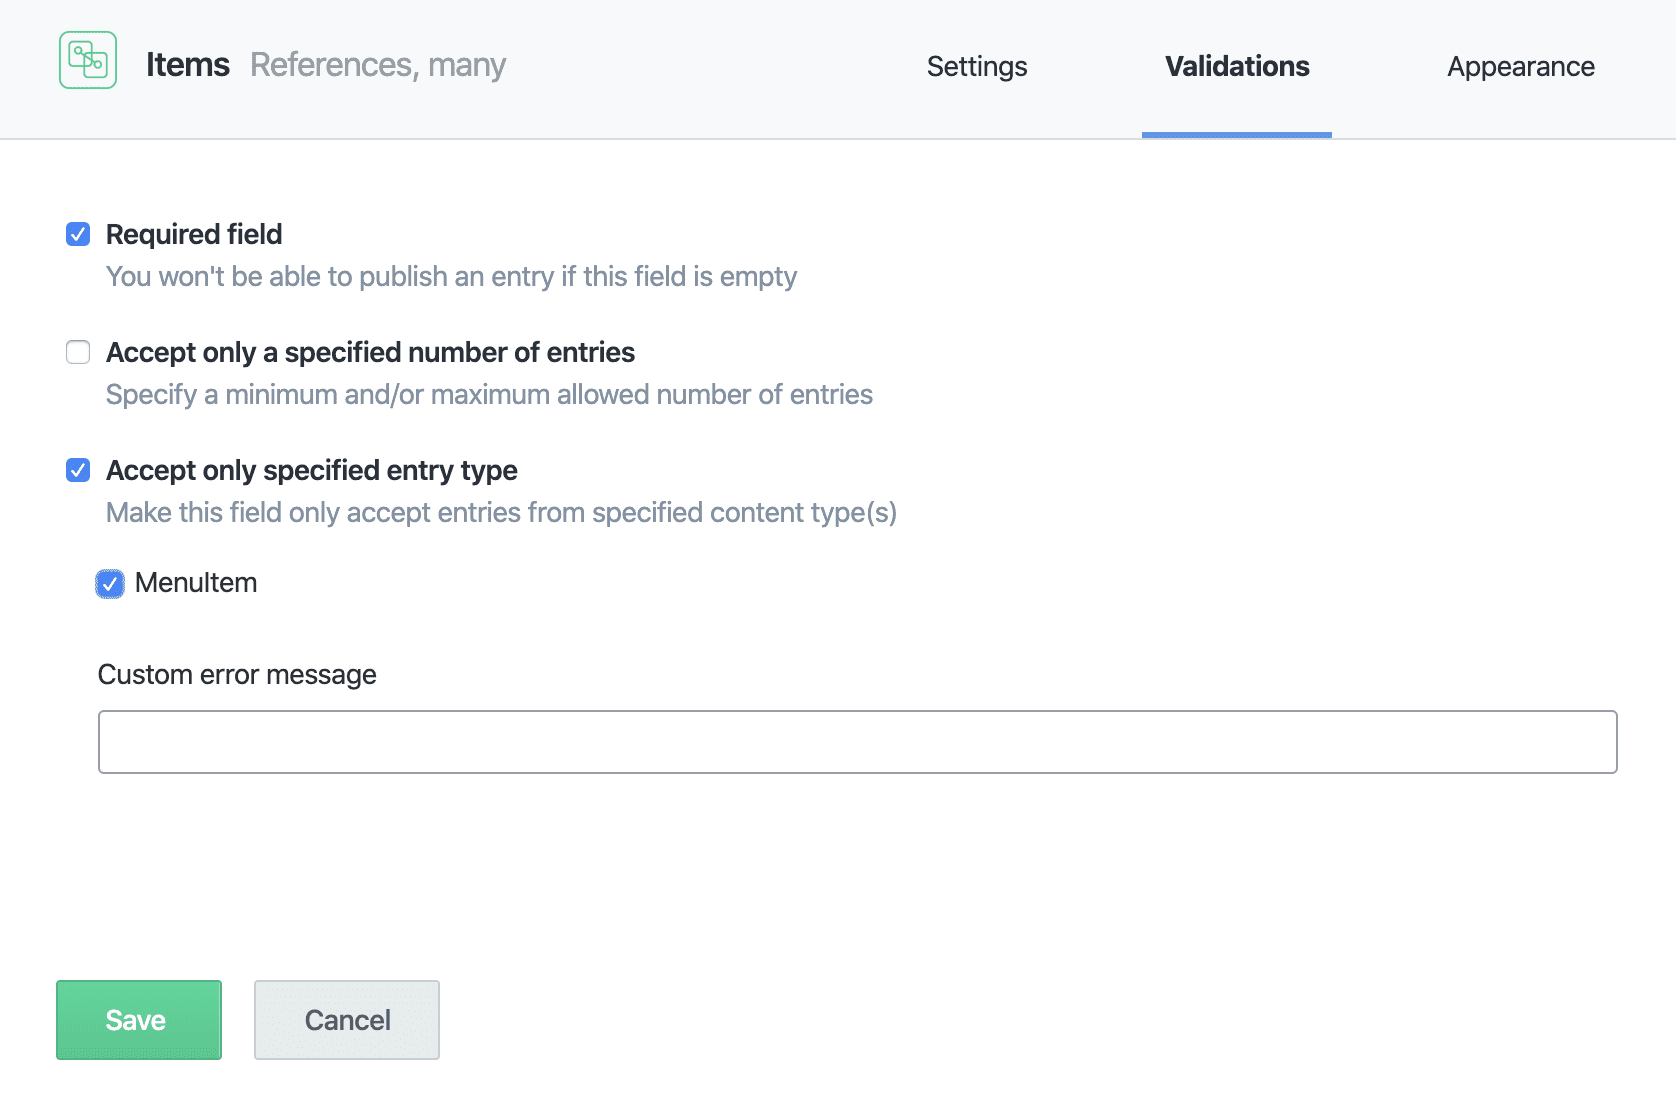
And then make it required and force all the referenced items to be MenuItems. You wouldn't want to reference other menu sections or other menus in the items field. Save it with those settings.
Final Content Type
Our final type "Menu" has only two fields:
- Name
- Name: Name
- Type: Text, Short Text, Required, Unique, Entry title
- List of Menu Sections
- Name: Sections
- Type: Reference, Many references, Required, Accept Only MenuSection
Adding Content
Now we need to add actual content. Jump over to the content tab. This is where the fun begins according to Contentful, okay.
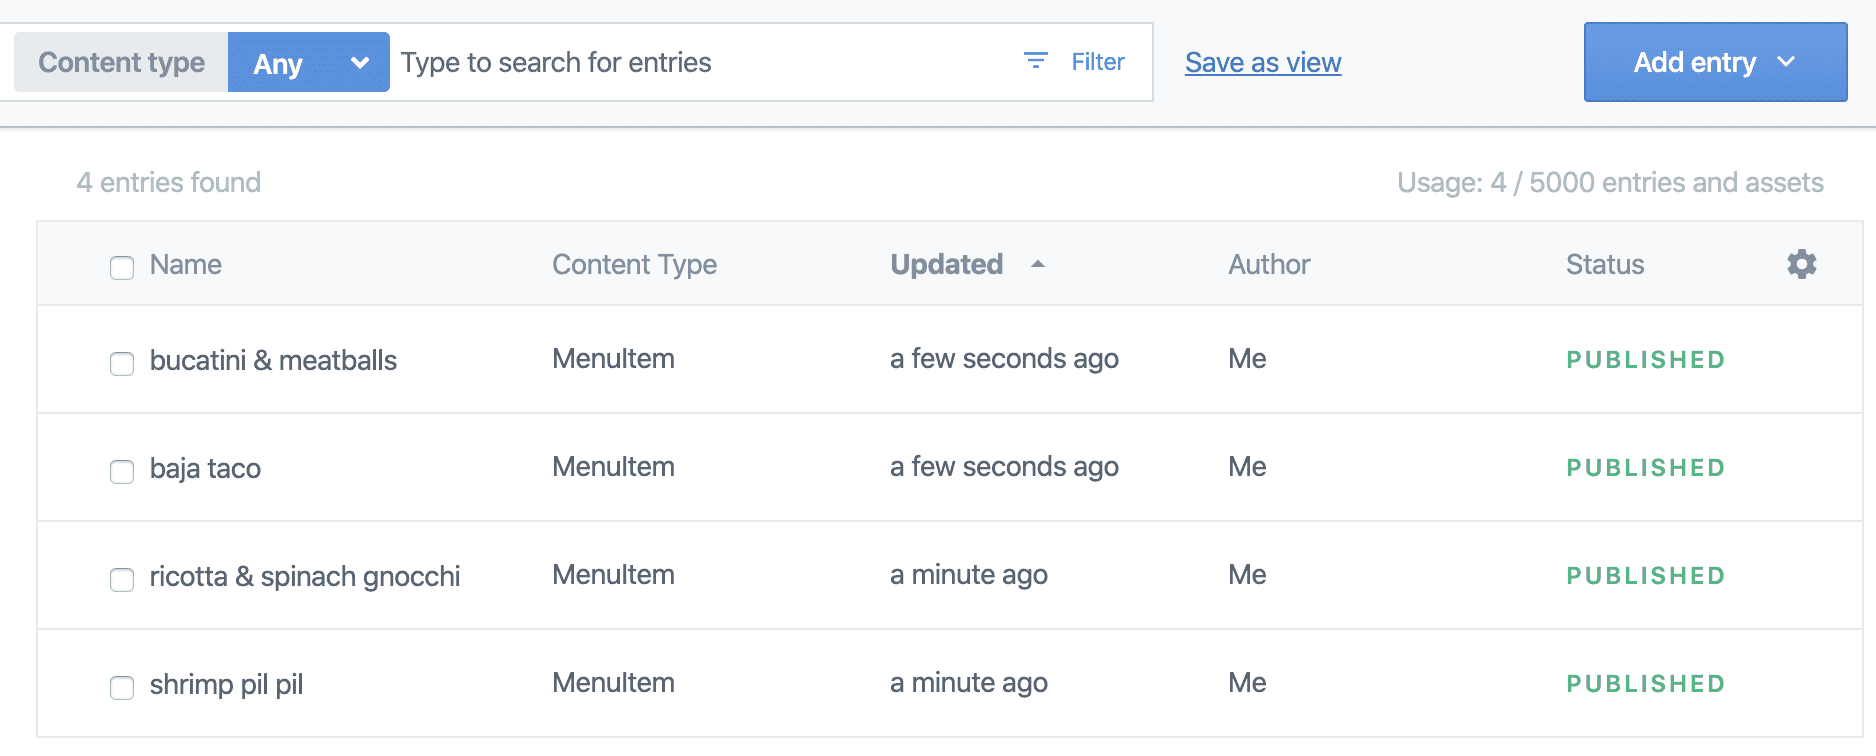
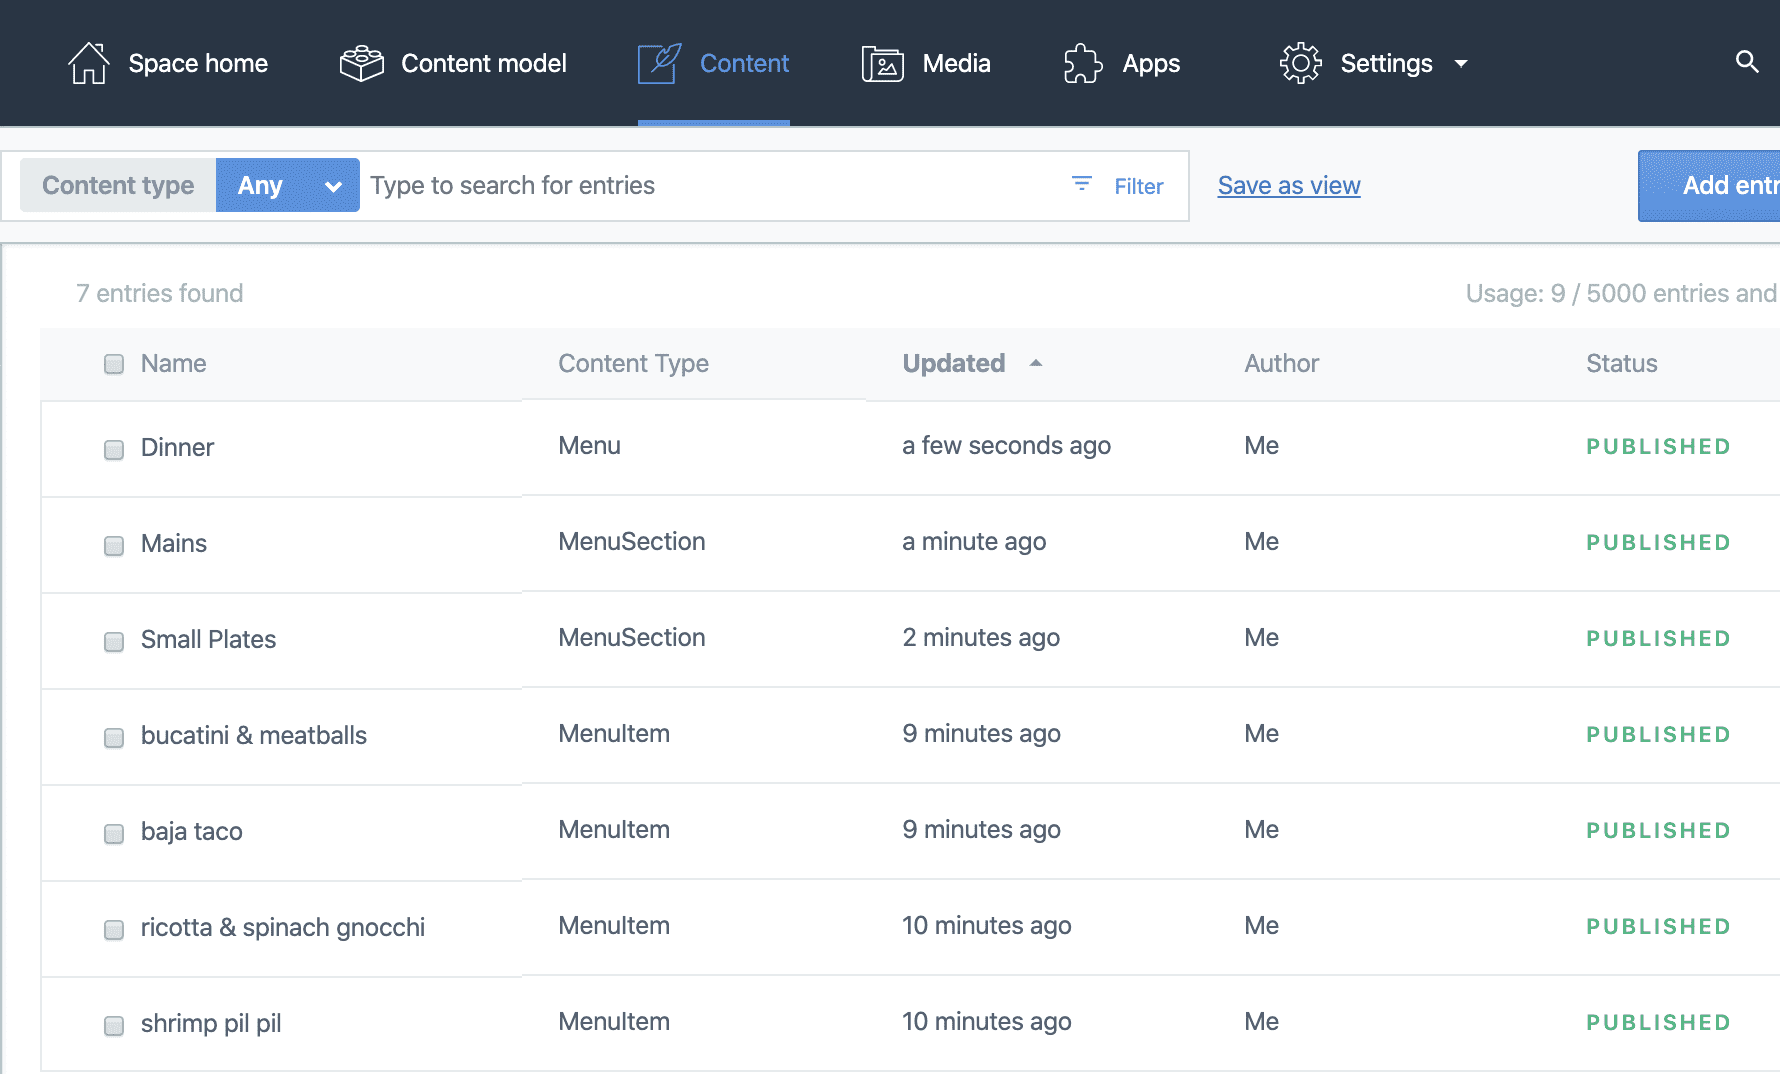
Put all four menu items from our original JSON file in the Menu Item content type. With the content model set up correctly this part is pretty smooth.
Once you have all four you should see this in the main content area.
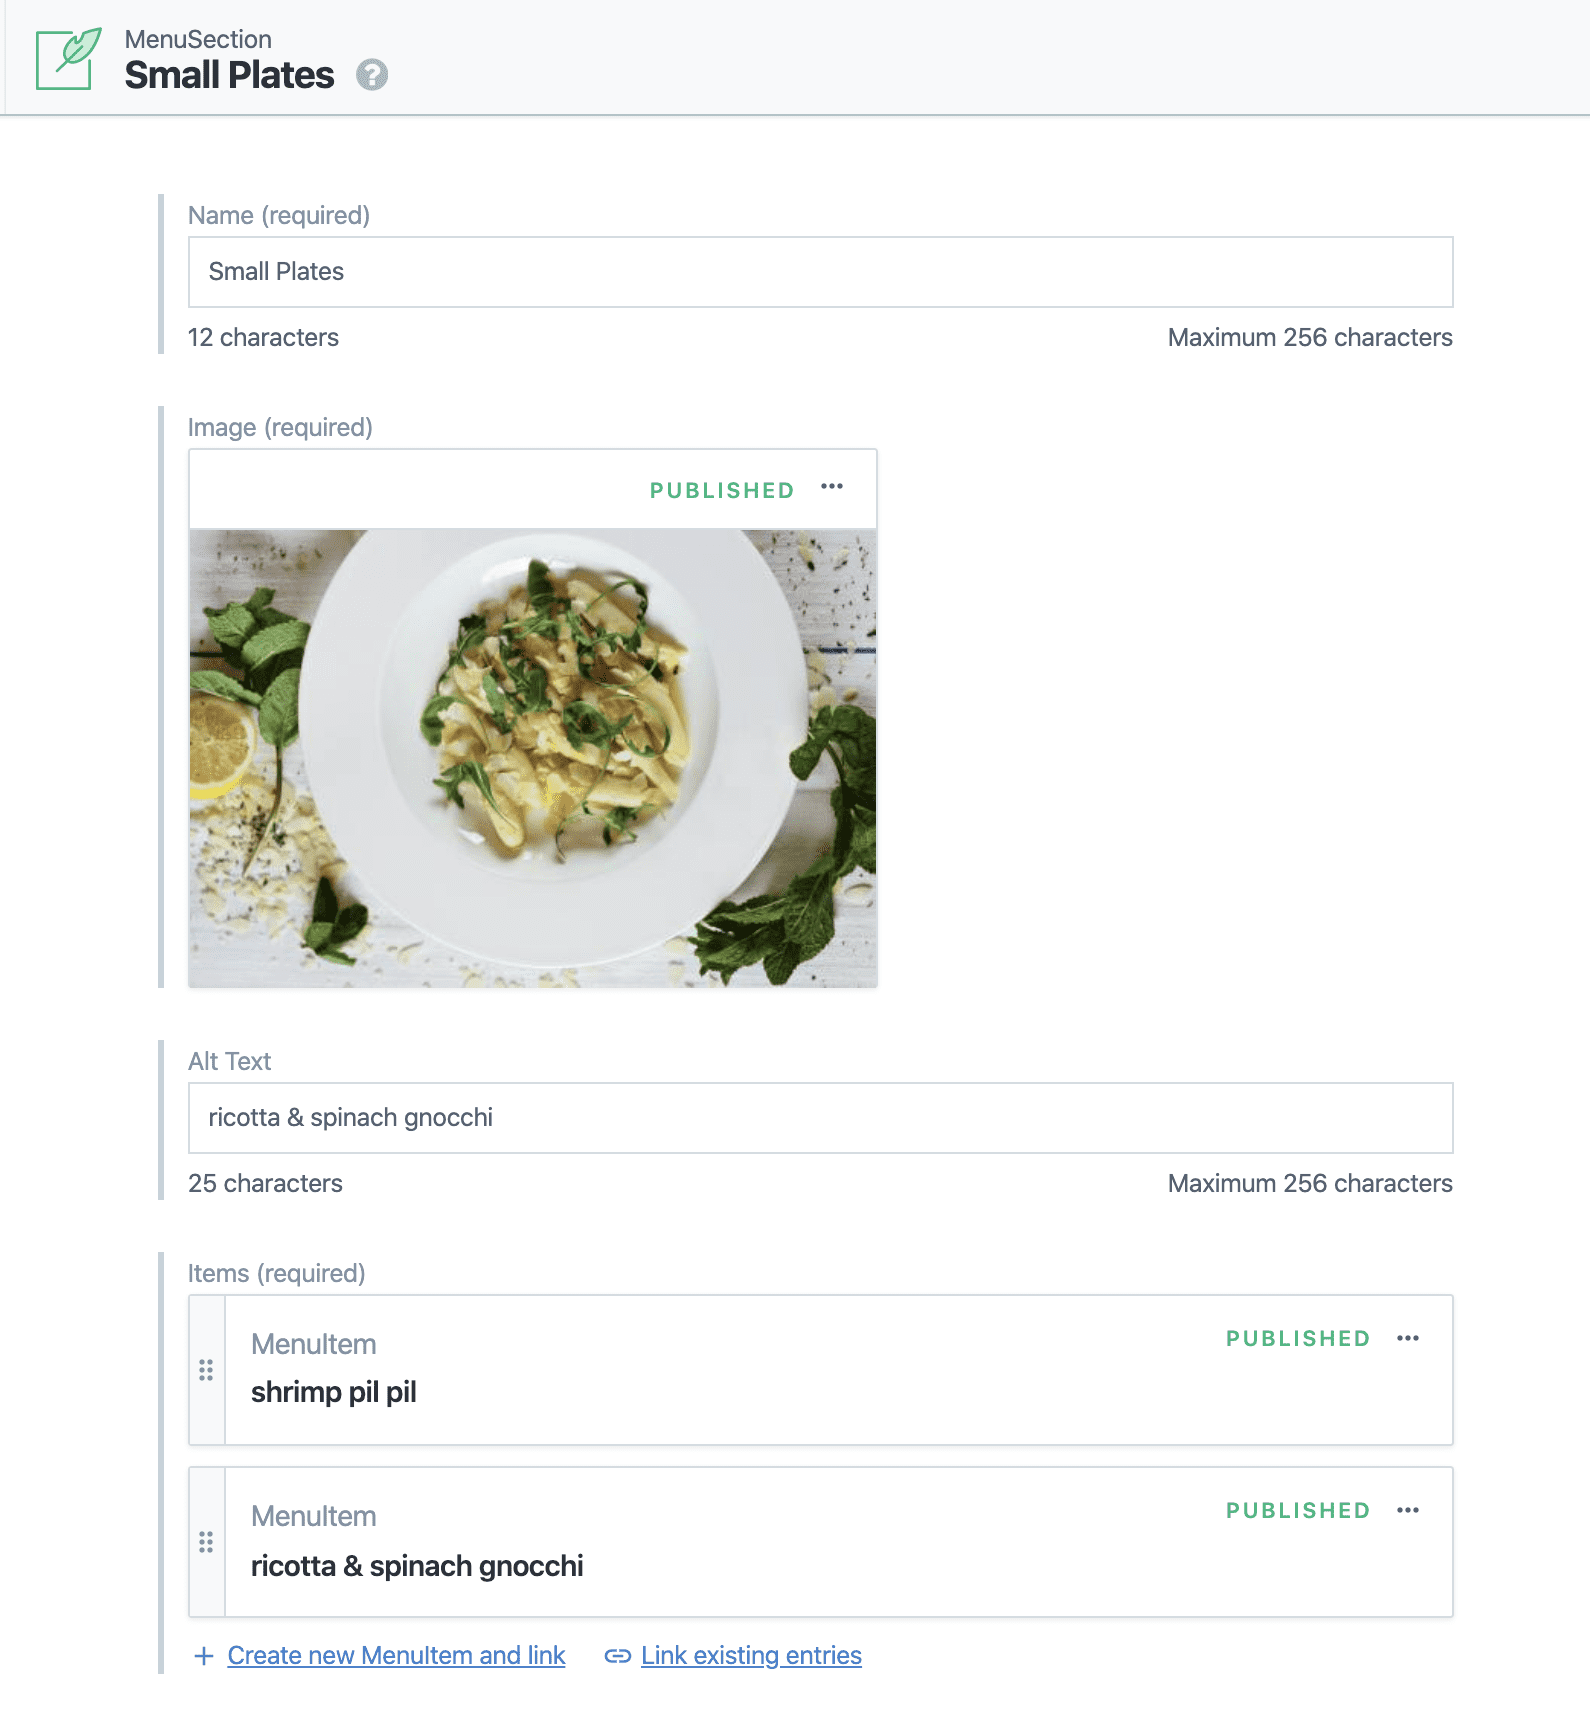
Now we add our menu sections. For the images you can download them from the links in the mock JSON content or you can peruse Unsplash for other open license images.
The small plates menu section should look something like this when you're done.
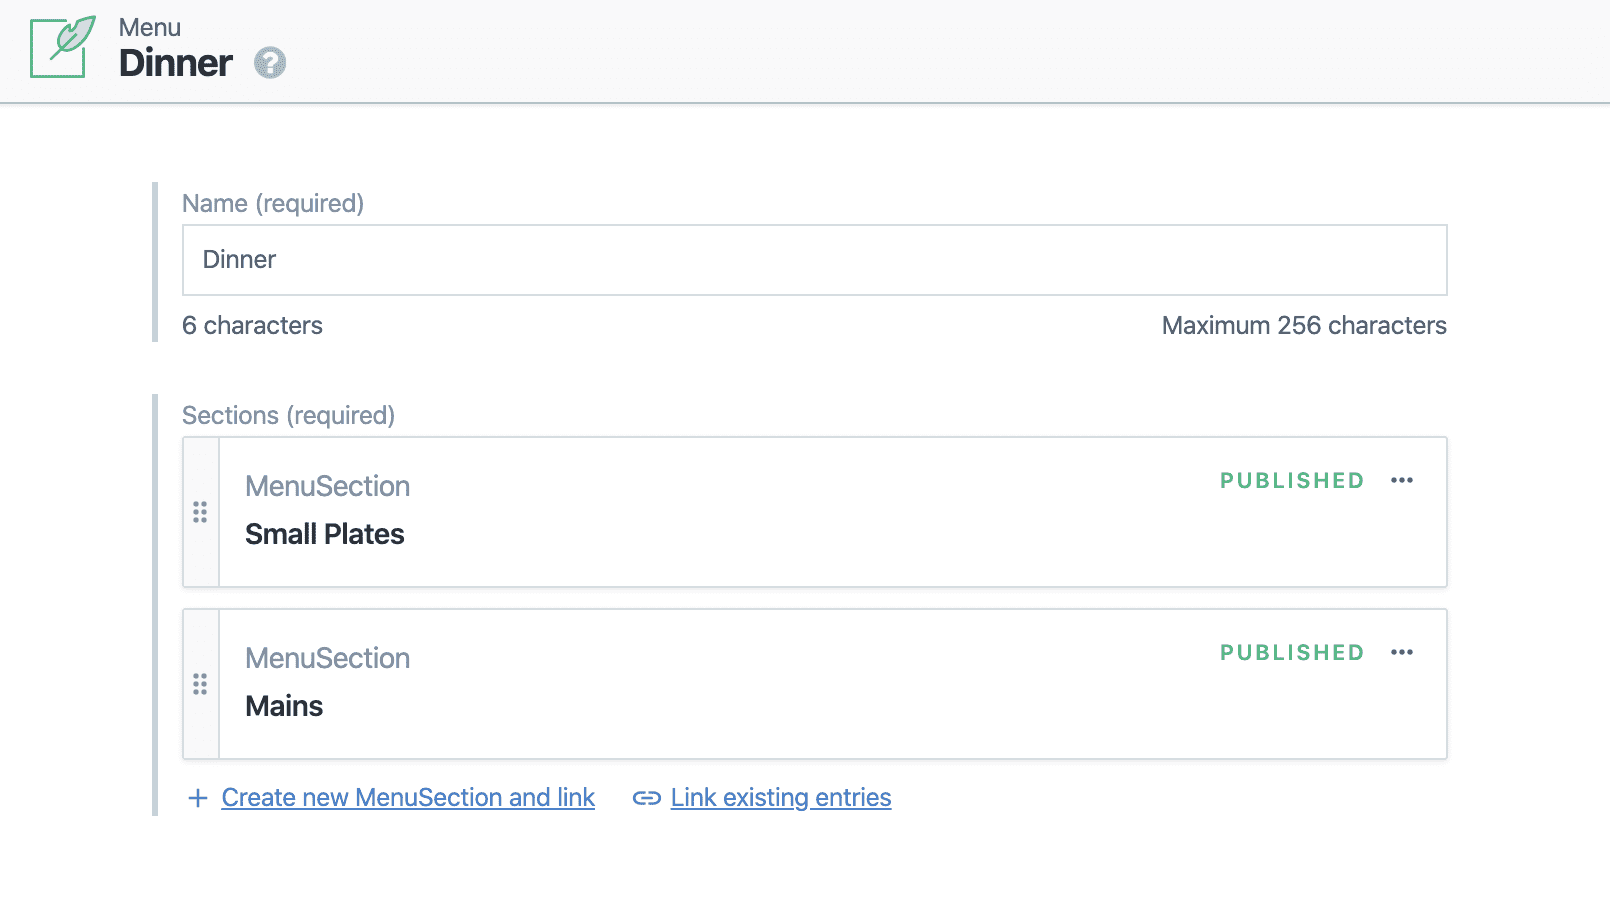
Add the mains section in the same way. Then finally add the dinner menu.
You should have four menu items, two menu sections, and one menu.
More work than a JSON file isn't it? But not nearly as painful as content management often is!
Linking Gatsby and Contentful
Okay, this is really the fun part.
Gatsby Source Plugins
Source plugins make it easy to grab data from various sources such as the filesystem, databases or third-party services. In our case, Contentful is our third-party CMS service and Gatsby has a plugin for it. It saves us from writing API requests by hand. We just need to provide it our Space ID and an API key. Let's install it.
yarn add gatsby-source-contentfulTo use the plugin we need to add it to the gatsby-config.js file and give it our Contentful settings. Your Contentful spaceId and accessToken can be found on Contentful on the top navigation Settings > API keys. You can use the example API key they provide or create a new one.
// gatsby-config.js
[
    {
      resolve: `gatsby-source-contentful`,
      options: {
        spaceId: `your_space_id`,
        accessToken: 'your_access_token'
      },
    }
    // .. other plugins
]
Remember your access token is a secret so you don't want to commit it to source control. Follow the plugin instructions for an example of keeping it safe.
Use GraphQL to Access Content
In Gatsby, all website data and metadata is accessed through a GraphQL query. Since we've setup a source plugin for Contentful in the last step, we will see Contentful data coming through the Gatsby GraphQL layer.
Make sure your development instance is still running, if it's not run yarn develop again. The Gatsby develop command automatically creates a Graphiql instance for us to write GraphQL queries with a visual editor. It runs on http://localhost:8000/___graphql.
Throw this query into the Graphiql editor and see what data comes back.
query ALL_CONTENTFUL_MENU {
  allContentfulMenu {
    nodes {
      name
      sections {
        altText
        items {
          name
          description
          price
        }
        image {
          fluid(maxWidth: 1000) {
            src
          }
        }
      }
    }
  }
}
Play around with the left-hand side pane and see what other fields are available - there're tons of metadata that Contentful provides.
Create a React Hook to Isolate Content Access
Now that we know how to query the data, let's write a React hook that brings that result in the context of our Gatsby site. Create a file at src/hooks/useMenus.js.
We will create a simple wrapper for that GraphQL query that can be used by any part of the website.
// src/hooks/useMenus.js
import { graphql, useStaticQuery } from "gatsby"

export default () => {
  const { allContentfulMenu } = useStaticQuery(
  graphql`
    query ALL_CONTENTFUL_MENU {
      allContentfulMenu {
        nodes {
          name
          sections {
            altText
            items {
              name
              description
              price
            }
            image {
              fluid(maxWidth: 1000) {
                src
              }
            }
          }
        }
      }
    }
  `
  )
  return allContentfulMenu.nodes
}
Now we modify our src/pages/index.js file to use the hook instead of the mock content.
// src/pages/index.js
import React from "react"
import Layout from "../components/layout"

import useMenus from "../hooks/useMenus"

const MenuItem = ({ name, description, price }) => (
  <div
    style={{ display: "flex", justifyContent: "space-bewteen", width: "100%" }}
  >
    <div style={{ flexGrow: 1 }}>
      <h4 style={{ marginBottom: 0 }}>{name}</h4>
      <p>{description}</p>
    </div>
    <p>{price}</p>
  </div>
)

const MenuSection = ({ name, items, image, imageAlt }) => (
  <div style={{ marginBottom: "4rem" }}>
    <h3>{name}</h3>
    <img src={image} alt={imageAlt} />
    {items.map(item => (
      <MenuItem
        key={item.name}
        name={item.name}
        price={item.price}
        description={item.description}
      />
    ))}
  </div>
)

const Menu = ({ name, sections }) => (
  <div style={{ marginBottom: "4rem" }}>
    <h2>{name}</h2>
    {sections.map(s => (
      <MenuSection
        key={s.name}
        name={s.name}
        items={s.items}
        image={s.image.fluid.src}
        imageAlt={s.imageAlt}
      />
    ))}
  </div>
)

const IndexPage = () => {
  const menus = useMenus()
  return (
    <Layout>
      <div style={{ maxWidth: "28rem", margin: "0 auto" }}>
        <h1 style={{ marginBottom: "4rem" }}>Menus</h1>
        {menus.map(m => (
          <Menu key={m.key} name={m.name} sections={m.sections} />
        ))}
      </div>
    </Layout>
  )
}

export default IndexPage
Note that the image usage also changed slightly to handle the way the image object changed from a straight source URL to an object with a fluid.src property.
I like to create hooks for GraphQL queries. It provies a nice seam in the layers of code. Components get to remain dumb just accepting props. The top-level page component makes a single call to a hook to get all the content needed. You could have fetched the Contentful data with a page query too.
Fin
And we're done! See the source code for the finished result and try tinkering around with Contentful and Gatsby.
Resources
- Gatsby
- Contentful
- Unsplash - photos with an open license
- Photo credits
